There is nothing here
Get Playback Through Web Interface
In this guide, we will show you how to load up the web interface of your Galaxy NVR and playback recorded footage.

Step 1: Open up either Internet Explorer or Firefox and type in the IP address of your NVR and hit “Enter”. (In this example, the IP address is “http://192.168.1.66:8080”)

Step 2: If this is the first time accessing your NVR with a web browser, you will be prompted to download a plugin. Please click on the “Download” link to start the download. If not, please skip to Step 4.
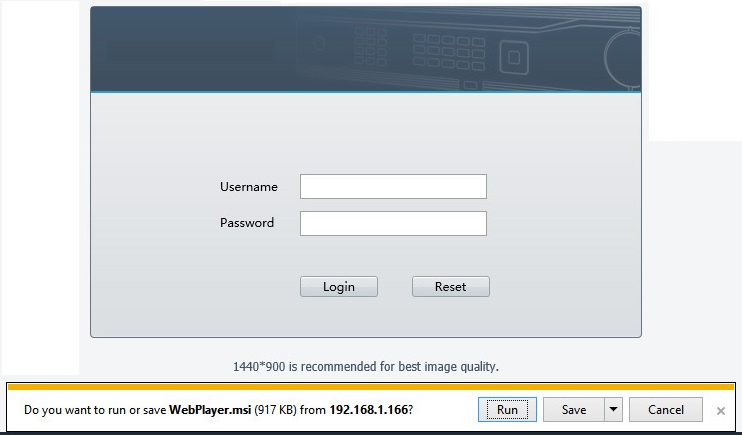
Step 3: If this is the first time accessing your NVR with a web browser and you have downloaded the plugin, you may receive a popup asking whether or not to Run/Open or Save the plugin. Just choose “Run/Open” and follow directions on the screen. After the plugin has installed, restart your browser and type in the IP address of the NVR again and hit “Enter”.
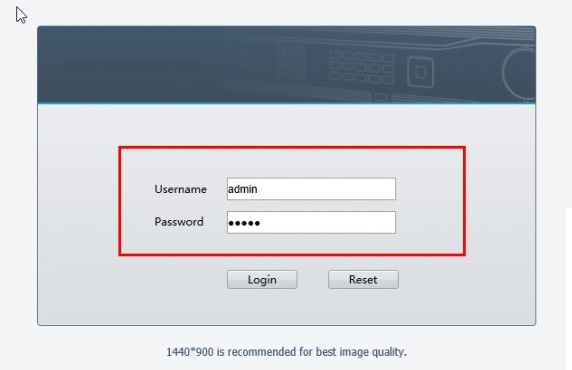
Step 4: Type in your username and password and click on the “Login” button. The default username and password are:
- Username: admin
- Password: 123456
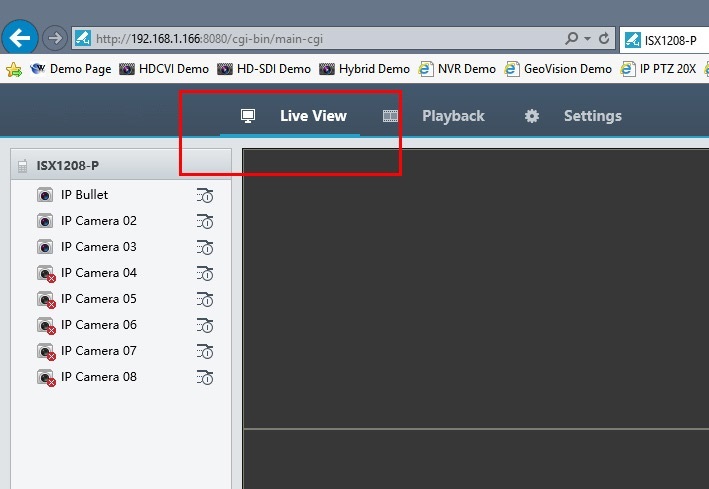
Step 5: Once you have successfully logged in, you will see a grid layout with blank squares. Near the top left of the web page, you will see three links you can click on to navigate to different functions on the NVR. Please click on the link/text “Playback” to enter into the playback section.
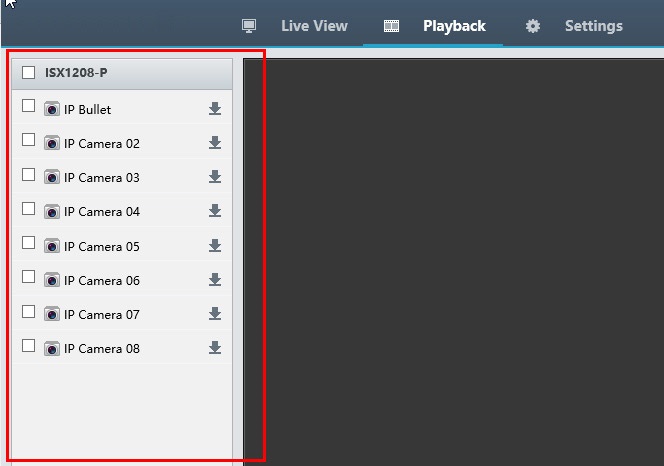
Step 6: Once in the Playback section, you will see a list of cameras on a left column, and a calendar below the camera list. First, select which camera(s) you would like review footage from.
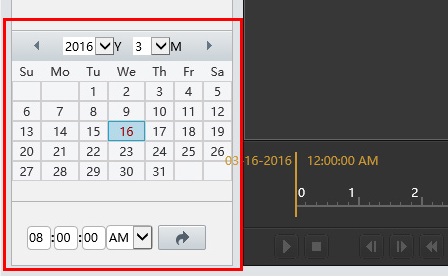
Step 7: Next, choose from which date you would like to review footage by click on the calendar date. If footage is recorded at any point during that calendar date for the camera you chose, you will notice that the date is shaded a light blue color. When you choose the date you want to review, you should see the timeline to the right of the calendar fill in either with blue or red blocks.
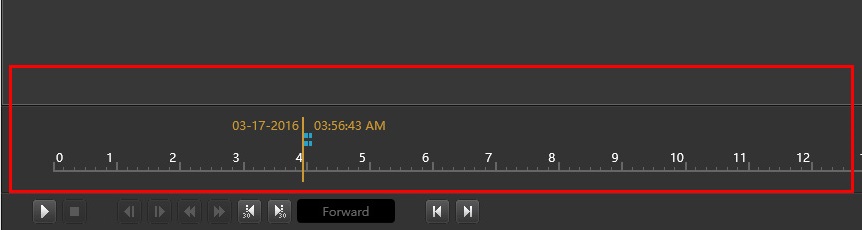
Step 8: From within the date timeline you can click on any time, 0-24 hours, to choose a start time, and then can click on the play button below the timeline. You should begin to see video play in the main window above the timeline. Browse along this timeline to find start and end time of the clip(s) you would like to save.

Step 9: Once you have found a clip, rewind the footage a few seconds before the event occurs and click on the Clip button that is found under the right side of the timeline. This will start a clip point. Once the event has passed you can click on the Clip button again to mark the end point. Pause the video at this point and then click on the Save button that is to the right of the Clip button.
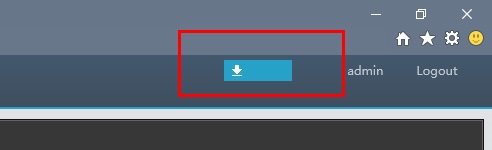
Step 10: If successful, you will notice a small turquoise square with a download indicator that will appear and begin to pulse, indicating a download to the default folder, “C:\Users\YourUsername\Surveillance\”. You will then receive a message when the download has completed. Navigate to the default download folder to find your clips.
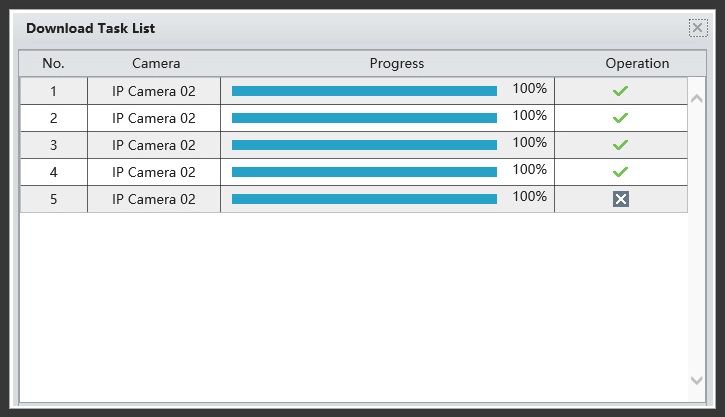
Step 11: If saving multiple clips, you can also click on the turquoise download indicator and you will see the box that appears to the left. It is a task list of downloads, either currently downloading or completed/aborted. When all clips have a green check in the Operation column, all downloads will have completed without any issues. You can now view any of the downloaded clips with your favorite media player.
Galaxy Security is a leading manufacturer of Security Cameras Systems (CCTV) in North America. We offer technical support for all our products. We offer affordable Quality CCTV video surveillance systems, cameras and accessories for the professional installers and resellers.
At Galaxy Security, Your Security is Our Business
Contact
Markham (Mon~Fri. 9am~6pm EST)
7755 Warden Ave, Unit 1,
Markham, ON L3R 0N3
Mississauga (Mon~Fri. 9am~6pm EST)
1200 Aerowood Drive, Unit 5,
Mississauga, Ontario, L4W 2S7
All online orders and payments are valid for our members only. © Copyright 2006-2025 Galaxy Security Corporation All Rights Reserved. Galaxy and Galaxy Security is the trademark of Galaxy Security Corporation and not to be used without prior written permission of the owner. Any unauthorized use of our website, social media
sites content, our name and Branded logos including GALAXY is strictly prohibited. All information and graphics on our website, digital and printed promotional material including Catalog and flyers are protected under the Canadian Copyright Act REGISTRATION NUMBER 1156284
